Howdy, InSpired community!
I’m kicking off with an article that has been popular recently regarding the SSO via Azure.
What is Azure Active Directory Seamless Single Sign-On?
Azure Active Directory Seamless Single Sign-On (Azure AD Seamless SSO) automatically signs users in when they are on their corporate devices connected to your corporate network. When enabled, users don't need to type in their passwords to sign in to Azure AD, and usually, even type in their usernames. This feature provides your users easy access to your cloud-based applications without needing any additional on-premises components. More information about Azure AD can be found here.
General guidance for SSO with InSided:

1. Setup on AAD
-
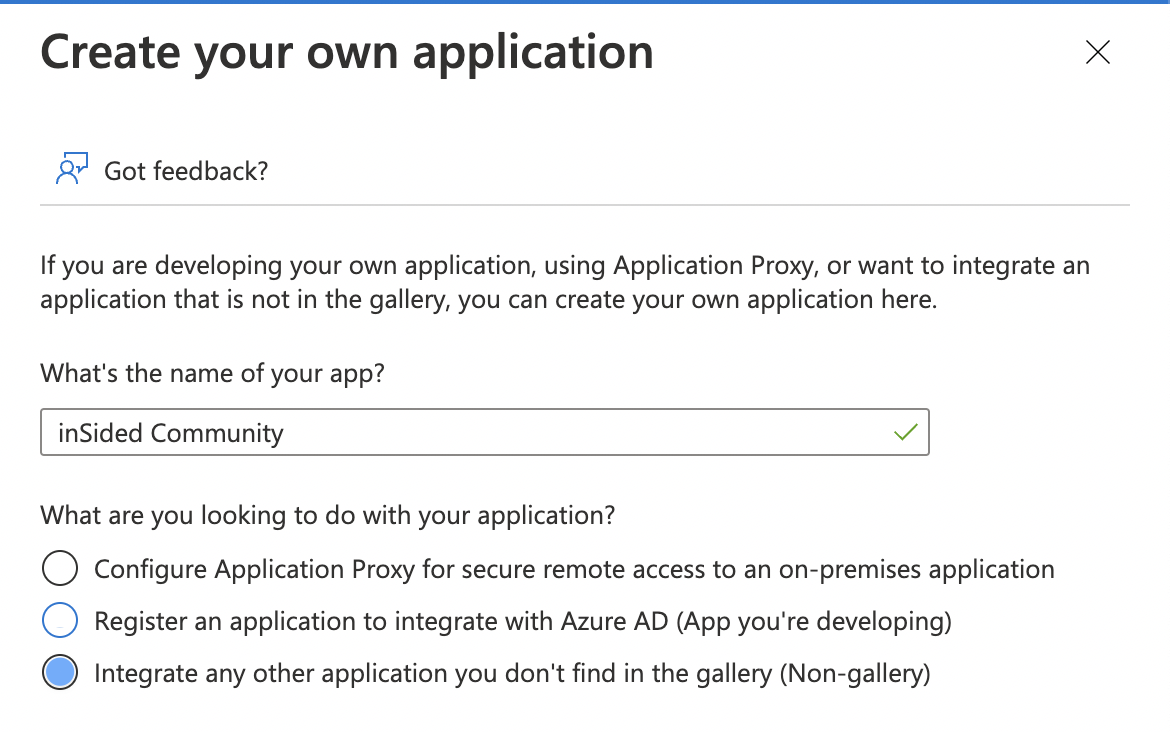
Create a new Application in the AAD portal
-
“New Application” > “Create your own application”
-
Enter a name and select the 3rd option:
-
Redirect URLs:
-
EU Customers: https://sso.api.insided.com/auth/saml/return?customer=[customer-id]
-
US Customers: https://sso-us-west-2.api.insided.com/auth/saml/return?customer=[customer-id]
-
Please note, your ‘customer-id’ can always be taken from your control url e.g in this case the customer-id is ‘gainsight-us’:

-
-
-
Wait for the application to be created and shown
-
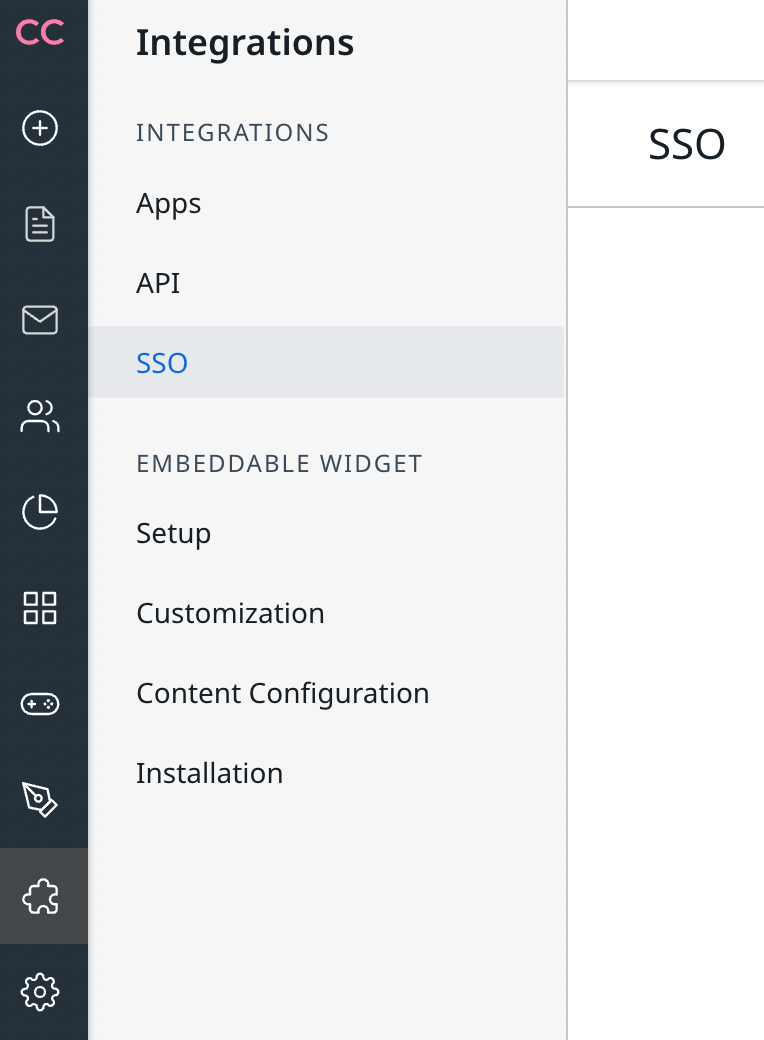
Next up, go to the inSided Select “Single Sign-On” in the sidebar:

-
Click on “SAML”
-
Download inSided SAML metadata:
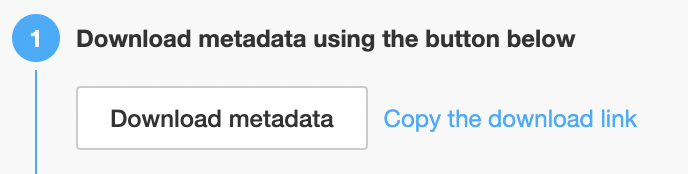
-
Click “Upload metadata file” in the AAD console, upload the file you just downloaded
-
Click “Save” in the panel that opens
-
-
To setup custom roles in AD:
-
Click on “Edit” on the 2nd step shown - “Attributes & Claims”
-
“Add new claim”
-
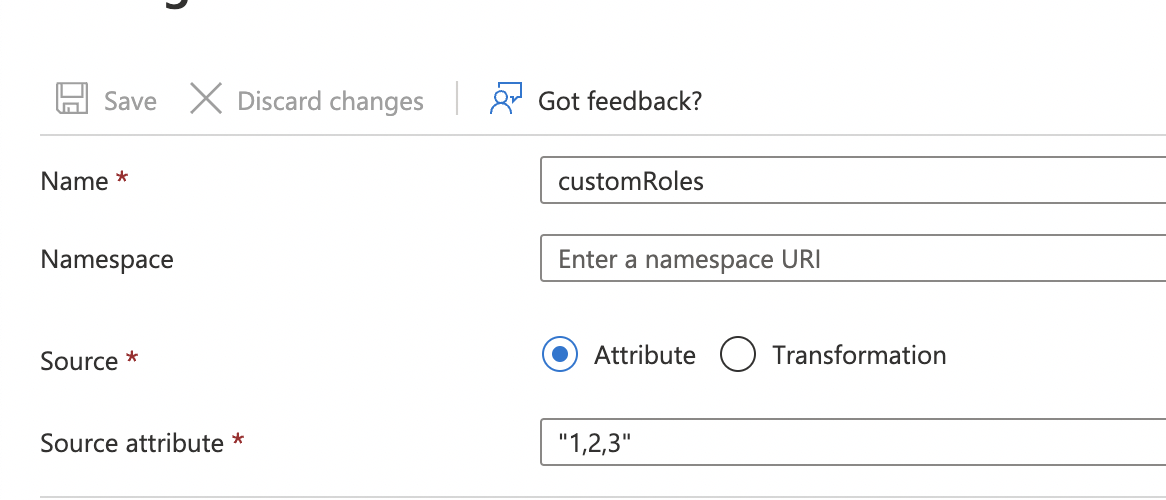
Fill in the details:
Name: customRoles
Namespace: <leave blank>
Source/Source attribute: according to your AD setup
You can either specify a literal string here to always pass the same custom roles, or you can specify a source attribute that can be set per user. -
Go back to the “Single Sign-On” config panel
-
In step 3 (“SAML Signing Certificate”), click on Download next to Certificate (Base64)
In step 4 (“Set up <App name>”), copy and note down the URL next to Login URL
2. Setup on inSided
-
Open the SSO configuration in your Control environment:
-
Click on Install next to SAML2:
-
Fill in the fields:
-
Single Sign-On URL:
paste the Login URL saved from the AAD console (should have the format of https://login.microsoftonline.com/.../saml2) -
Public Key:
Content of the downloaded certificate
Should begin with -----BEGIN CERTIFICATE----- -
Preserve manually granted roles:
Optional; if unchecked, all assigned roles will be reset to what is received via SSO. If checked, then roles granted manually via Control will be preserved, and merged with the value received through SSO
-
-
Click Save Changes
-
Click on Test Login to test the whole flow